Tuesday, September 13, 2011

recent work

I have been blessed with a ton of commissions over the past two months so I thought I would share a few images. 


This was my Dad's shirt. It was is great condition and I remember him wearing it often. I thought it would be fun to play with shoulder straps that tie different ways. I made them extra long so that I could tie a bow in the back or in the front or double wrap the waist and use a simple knot tie in the back. (I made this for my daughter, so technically not a commission.)


My sweet friend (and an incredible mother) commissioned this dress for her sister's baby shower. She brought me one of their father's shirts and I made a dress for her soon-to-be-born niece and her son. I loved the yellow seersucker fabric.


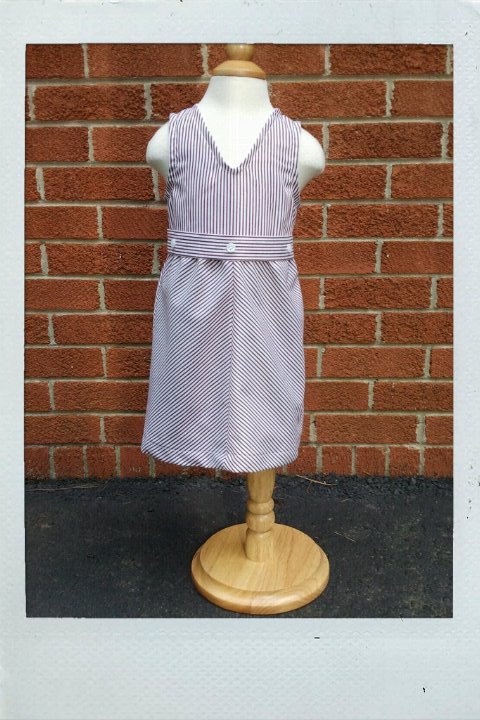
I love a little girl in blue! This dress will be perfect for its owner. It's very simple but stays true to the original shirt (with just a touch of femininity). Hopefully she will enjoy wearing it.


This shirt started out as a womens dress shirt and a few things I really liked about it was the color and the cuffs. There is a little grey line (!) throughout the fabric so I played that up by accentuating the button placket with grey bias tape along the edge. I used the original sleeve and cuffs but shortened them so that they would hit about 3/4 length. The dress is size 3T. 


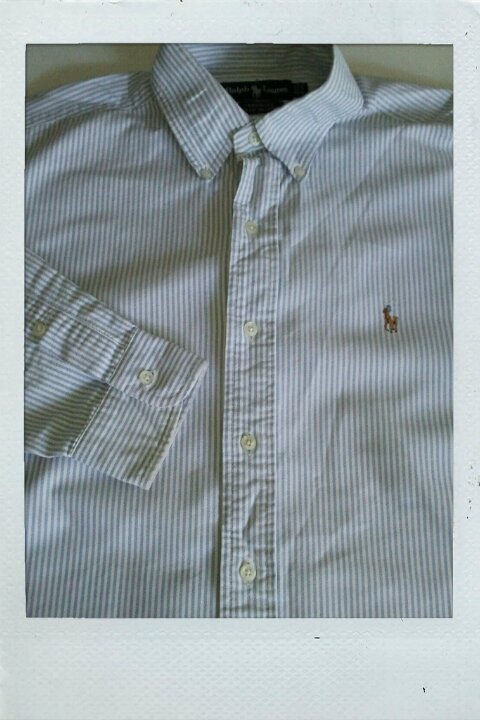
One of my husband's oldest childhood friends has been really kind to support my work and recently asked me to make a dress for his daughter (size 4T) and a coordinating belt for his older son. I loved working this blue and white oxford fabric (and they are UNC fans so the color combination works double-duty!).  My favorite part is the way the shoulder straps attach to the back of the dress. I used the sleeve buttons and fabric to piece these in. (I only wish I had ironed it a bit better before taking these photos...)


My great-uncle commissioned this dress for his son's daughter. He has a blue shirt just like this yellow one he brought me to transform and he's going to wear it when he gives this dress as a birthday gift. (He loves the sentimental stuff as much as I do!)


missing, but still in action!

So....this blog is in serious need of an update!

Lately, I have been so busy physically making dresses that I haven't had any time to talk about making dresses. My sincere apologies...though I am happy to have this problem!


One of the big projects I am working on is a collection of 22 dresses for a fantastic boutique children's consignment store in Raleigh called Babiology.  It was such an honor to be asked to make some dresses to sell in their store. The 22 shirts belonged to the husband of one of the owners and I am working on several different long-sleeve (fall/winter) styles in a variety of sizes from 18 months to 5T.


Here's a sneak peak at two of the dresses. I hope to have the full collection to the store by the middle of October. 


Monday, August 8, 2011

twenty

I have tackled quite a few designs made from striped shirts (here and here and here and here) but I haven't really explored what I could do with the actual stripe pattern. I thought it would be challenging to utilize the stripe in a diagonal in some way. 

This shirt is from a very generous pile of great women's dress shirts that my sister-in-law's mother gave to me. In the bag of loot were two shirts that were exactly the same except for color. There was a blue and white stripe and a brown and white stripe. I decided that since this would be a new design I would use the brown and white stripe as my sample and then make another from the blue and white later.


The only trouble with transforming stripes into a diagonal pattern is that it takes more fabric. I had to use the entire back of the shirt and both sleeves in order to have enough fabric for the skirt portion of the dress. I realized that piecing the fabric into a chevron pattern would be the best solution aesthetically and realistically given the amount of material I had to work with (this would be a little easier with a larger-sized men's shirt). 

Below is the way the design looked when I first pieced the bodice and skirt together but I realized quickly that the rounded neckline was not working with the angular pattern of the fabric. I changed it to a V neck. 


This is the way the design started but I realized quickly that rounded neckline was not working with the angular pattern of the fabric so I changed it to a V neck. 


The back of the dress is high to the back of the neck and is taken from the front button placket of the shirt. 


A detachable belt ties at the waist and is made with fabric remaining from the front button placket of the shirt.


Wednesday, August 3, 2011

labels

The satin labels I had custom printed have finally arrived. I really love how they look in each dress. 


Tuesday, August 2, 2011

nineteen


I will post more about this dress later, but wanted to get a few images up of my lastest creation. This one is sized on the smaller size for an 18 month old.

Friday, July 15, 2011

seventeen + eighteen


My husband's parents have always been generous with their excitement for the things I am doing. When they heard about Little Grey Line I could tell they loved the idea and the next time I saw them they brought a bag full of perfect shirts with them! 

I decided to start with this summer-plaid shirt because we will all be going to the beach for a week at the end of July and I wanted the cousins to wear something made from their grandfather's shirt. There are three cousins: Adeline, Tucker (2 1/2), and Reagan (9 months) so I used the shirt to make coordinating outfits. 

A full-skirt dress for Adeline with thick shoulder straps and an opening on the back made from the button placket off the front of the shirt. 


A coordinating dress for Reagan using the plaid fabric for the bodice and denim for the skirt.  (She wears a size 12 months, so this dress is a little small for the dress form as you can see.)


And for sweet Tucker, who I didn't want to leave out, I decided to make a simple belt from the plaid shirt. 

 
My sister-in-law has a great camera so I will certainly update this post once we have some photographs of the cousins on the beach together. I can't wait to see them all in their clothes and I know their grandparents will be pretty excited, too.


Thursday, July 7, 2011

sixteen


Another fine dress shirt lost to an elbow blow-out! As with dress fifteen, this shirt was in great shape except for the worn fabric at the elbow. It's hard to tell from the pictures, but the color is beautiful. It's a subtle mint color with a simple gingham pattern.


Since this would be going to the same little girl as dress fifteen, I wanted to make a completely different style. I decided to use the pocket on the front of the shirt as the driving force behind the design and kept it located in the center of the dress. (The pattern of the pocket fabric and the shirt fabric are actually matched so perfectly that it's almost hard to see the pocket in these photos!) This placed the button placket on the right side of the dress.

I added a bit of fabric to the pattern on either side of the dress so I could gather the sides a bit for a better fit at the arms but still allow for more fullness in the body. A button piece from one of the cuffs was used for the shoulder opening on the right side to make it as easy as possible to get on and off. I kept the box pleat from the back of the shirt as the back of this sweet dress.